

Cub Scout Achievement Banner
Cub Scout Achievement Banner
Cub Scout Achievement Banner
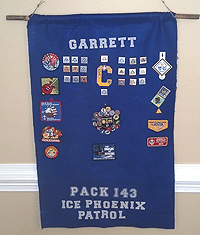
By Garrett Cargo (Age 10)
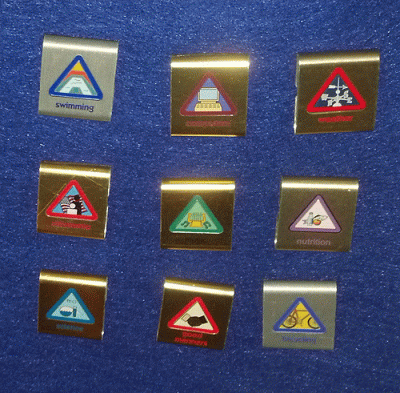
Spring is the time where Cub Scout Packs hold thier annual Blue & Gold Banquet. This event will signify the end of Cub Scouts for Webelos II boys as they bridge over to Boy Scouts. One of Garrett's final Webelos pins to be earned was the Webelos Craftsman pin, which required the following: "Make four useful items using materials other than wood that you and your Webelos den leader agree on, such as clay, plastic, leather, metal, paper, rubber, or rope. These should be challenging items and must involve several operations."
We came up with an idea to display his many patches, pins and belt loops earned during his time in the Cub Scouts. Up unitl this point hard-earned awards have resided in a plastic sandwich bag in a desk drawer never seeing the light of day. This is a great mother/son or father/son project. Parental supervision is needed when using the hot glue gun and the household iron to avoid burns.
Items Needed:
- Kreinik 1" Treasure Tape
- Fabric 24" x 40" (you could use poster board)
- Hot Glue Gun
- Iron-On Letters & Numbers
- Scissors
- Leather Lace
- 28" long rod/stick (we used bamboo)
- Yardstick
- Household Iron
- Chalk
Instructions:
- Using a pair of scissors, trim your banner to the dimensions desired. We used 24" x 40".
- Plug in and pre-heat glue gun. We will now create the sleeve for your wooden rod/stick. Lay your rod/stick on top of the banner and fold the fabric over so that the fabric covers the rod plus gives an extra 1/2" to make sliding the rod in the sleeve easier. Where the fabric meets the back of your banner, use a piece of chalk to mark the edge. Using the glue gun, add a bead of glue along the chalked line. Now fold the felt over so the top edge of the fabric is sealed with the hot glue from edge to edge. This glued edge will be on the back of your banner.
- Pre-heat your household iron to the iron-on letter manufacturer's recommended temperature settings. Cut out the iron-on letters you will use. To keep the letters straight, use a yard stick. After you cut out the letters, be careful to orient the letters so they spell out the names properly because once you iron that letter onto the fabric it will not come off (yes Daddy screwed up the number 3). (Tip: write on the paper side of the iron-on letter what the letter is so you lay the letter out properly. You can hold the letter up to a light so you can see if you have the letter facing the right way.)
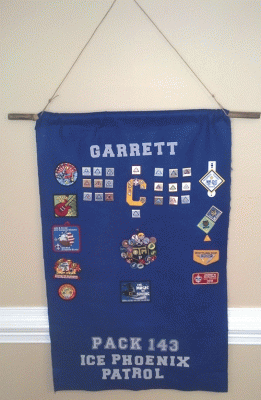
- Arrange your patches and belt loops to decorate the banner. We took any patches off of our old "Class A" blue cub scout uniforn and will take any patches off of our Webelos uniform. To make non-sticky items like this stick to the banner use Kreinik Treasure Tape. Simply cut off a piece to Treasue Tape and place it on the back of a patch or belt loop. Peel off the red liner and then press the item in place on the banner. Continue until done. For better adhesion you can "heat set" the belt loops by ironing on the back of the banner.
- To finish your banner slide the 28" long rod/stick through the sleeve at the top of the banner. Using the leather lace, tie a double surgeons loop at each end with enough room to be able to slide on each end of banner rod/stick.
Would this product be useful in your business (ie, manufacturing, teaching, retail)? If so, you could benefit from bulk quantities at wholesale pricing. To open a wholesale account, we require a copy of your business license on file. Send a copy along with your business name and contact info to:
- Rainbow Gallery (owner of Kreinik threads), 2860 North Ontario Street, Burbank CA 91504 USA
- Rainbow Gallery phone 747-283-2006
- Email info@kreinik.com