
Jewelry
Creative ideas for jewelry
-
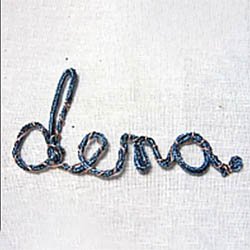
Wired Thread Jewelry Technique
Note: this item is not shipped
Designed by: Amy Law
Skill Level: BeginnerHand-made jewelry is just about the "coolest" thing around. Whether you're a teen, a mom with kids, a professional businesswoman, grandma, or free spirit of any age, wear your art out! It's showing your personal style, color, and confidence. If you've never made your own jewelry, here's a fun project to get you started. Visit a craft or bead store for the wire and tools.
Colored wire can be used for a variety of projects, from scrapbooking to jewelry. This technique allows you to take any kind of wire and customize with whatever color of Kreinik braid you desire.
Materials:- 22 gauge wire (copper, silver, etc)
- Kreinik #32 Braid in desired color
Instructions:
1. Insert the end of your wire into the end of your thread.
2. Holding the thread loosely, push the wire into the center of the thread. If the wire catches or pokes through the braid, pull back a little and reposition it.
3. Continue pushing your wire in until you have the length you need. Secure the ends either by wrapping with tape, with jewelry adhesive, or by wrapping over with the end of your wire.
4. Use your thread-covered wire to make shapes, words, or designs. Attach pin backs or other jewelry findings as desired.Alternate: Shape your wire into desired form (name, flower, etc), then wrap the the metallic thread.
-
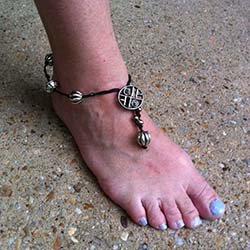
Wired beaded anklet in silver and black
Note: this item is not shipped
Designed by Linda LindgrenThis quick macrame-like jewelry project makes great use of extra beads and buttons you may have in a box or jar. Use the Kreinik Wired Braid™, a shapable metallic, as the main thread, and the anklet will keep its shape much better as you walk-and-wear.
Materials needed:- Kreinik Wired Braid™ in 005 Black
- six large beads, mixed designs in black and silver finish
- five to six round silver beads
- one large decorative button, with shank, silver and black finish
- scissors, white glue
Instructions:
- Dip ends of Wired Braid™ into white glue, smoothing fibers into a point for ease in threading through beads. Allow to dry.
- Fold Wired Braid in half and string one small silver bead to center of fold. Tie two "over hand" knots close to small bead.
- Measure approximately 1 inch from knots and tie one over-hand knot. This loop will wrap over the button to secure the bracelet.
- Hold both strands of wire together and thread through one large bead, bringing bead snug against over-hand knot, tie an over-hand knot against the bead. Measure 1/2-inch from knot and tie another over-hand knot. Continue adding large beads, securing with knots, using five beads.
- Measure 1/2-inch from last bead and tie a knot. Thread wire through bead shank and secure with a knot.
- Divide wires, thread and a small silver bead onto each wire, hold wires together and tie a knot. Repeat one more time with small beads.
- Add last large bead to ends of wire and secure with knot. Bring ends of wire around button, and wrap firmly at base of button, trim as needed and insert ends into bottom of bead.
-
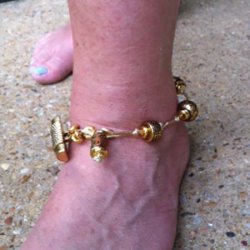
Wired beaded anklet in gold
Note: this item is not shipped
Designed by Linda Lindgren
Kreinik Wired Braid™ is a metallic thread with a wire insert - it's soft and flexible, but keeps its shape better than a non-wired thread. It's perfect for making macrame-style jewelry like this. Add any beads you have leftover from another project, and you have a fun accessory to wear out on the town.
Materials needed:- Kreinik Wired Braid in 002 Gold
- six large beads, mixed designs in gold and black, or your choice of colors
- 17 small gold "donut" beads
- one large decorative button with shank, gold and black or your choice of color
- scissors, white glue
Instructions:
- Dip ends of Wired Braid into white glue, smoothing fibers into a point for ease in threading through beads. Allow to dry.
- Fold Wired Braid in half and string one small donut bead to center of fold. Tie one over-hand knot against bead, holding both strands of wire together.
- Measure approximately 1-inch from knot and tie one over-hand knot. This loop will wrap over the button to secure the bracelet.
- Hold both strands of wire together and thread through one donut bead, one large bead and one donut bead, bringing beads snug against over-hand knot, tie an over-hand knot against the bead. Measure 1/2-inch from knot and tie another over-hand knot. Continue adding large beads and donut beads, securing with knots, using five beads and ten donut beads.
- Measure 1/2-inch from last bead and tie a knot. Thread wire through bead shank and secure with a knot against button shank.
- Divide wires, thread a donut bead on one wire, tie knot against bead. Repeat three more times using four donut beads. Hold wires together and thread one donut bead, one large bead, one donut bead. Tie ends of wire in a large knot and weave ends back through large bead, trimming ends as needed.
-
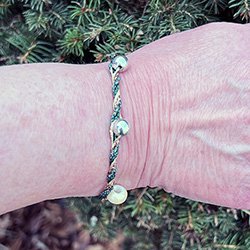
How to make beaded friendship bracelets
Watch Doug Kreinik show you how to add beads to cording while making friendship bracelets with the Kreinik Custom Corder:


