


Can you wash and iron metallic threads?
You finished your cross stitch or embroidery project and it looks fabulous! Except for the ring indentations left by the embroidery hoop, or creases still visible from the folded fabric. Now what? Can you iron metallic threads?
We want our needlework to look absolutely stunning, right? When all is stitched and done, how you treat your stitching will make a difference in how long it lasts and how good it looks. So this is an important step in any cross stitch or embroidery project. Let's take a look at the potential problems that can happen when you finish stitching, and we’ll answer one of the most frequently asked questions: how do you iron metallic threads?
Step 1: Washing metallic threads
We hope you've kept your hands clean as you stitched, and kept your project away from dust, spills and similar. Barring any spot clean-up you may have to do, you may want to wash that project any way. Unseen oil on skin, for instance, will show up in the fabric over time. The good news about your favorite metallic threads: you can hand and machine wash Kreinik metallic Braids and Ribbons. We suggest using a gentle cycle. Hang to dry or tumble dry on low.
The potential problem in washing: bleeding colors. There are some colors like red that are notoriously not colorfast, but you have to be careful with blues and greens too—and this applies to cotton floss as well. In the Kreinik thread line, colors 003L and 006HL may bleed. Stitch a test swatch and check colors in water just to make sure.
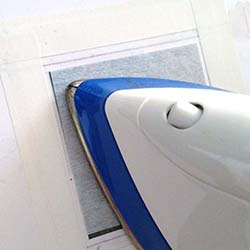
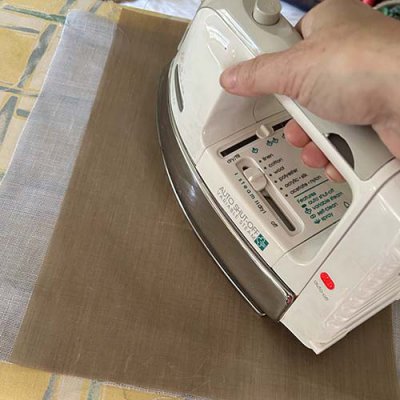
Step 2: Ironing metallic threads
Yes, you can iron Kreinik metallic threads, BUT use a press cloth. Do not place the hot iron directly onto the metallic, as the thread will melt or shrink. Most metallic threads are synthetic, made of polyester and/or nylon, and they don't like high heat. 
What is a press cloth?
- a piece of muslin, cotton, or similar uncolored fabric
- a sheet of nonstick Teflon press cloth (Kreinik carries these)
- Kreinik also has adhesive press cloths to cover an iron plate
Place your needlework on the ironing surface, cover it with the press cloth, then press with your iron (large home iron or craft size iron). Reposition the cloth as needed to press your project. Do not use steam on the metallic area.
If using fabric as your press cloth, wash it first to remove any sizing, and make sure it is white, not colored. If needed and desired, dampen the fabric slightly instead of using the steam setting on your iron.
The benefit of a nonstick press cloth over fabric: it will last longer and be easier to clean. Also, it's ideal for ironing other items like fusible appliques, interfacing, hem tape, etc as it will keep the adhesive from gumming up your iron.
Side note: should you place your needlework face down on your ironing surface, or face up? Basic cross stitch designs can be ironed face up (with your press cloth on top). If using dimensional stitches like French knots, however, put your needlework face down onto a towel or padded surface, cover with your press cloth (metallics are on the back of your work, too!), and press; this will keep your iron from flattening the stitches.
Get a press cloth and keep it with your cross stitch and embroidery supplies. You will always be ready to finish your beautiful project the safe way, to keep it looking fabulous for years to come. This go-betweener will protect your embroidery and threads—regardless of their content—from potential damage from an iron.