
- Shop Fly Fishing
-
Shop Needlework
- Metallic Threads
- Silk Threads
- Kits & Sets
- Accessories
- Free Patterns
- How To
12 products found
Sort by:
Recommended
Shop Needlework > Accessories > Custom Corder
-
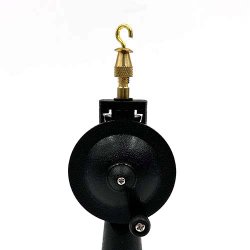
Kreinik Custom Corder
Make customized cording, piping, straps, and trim to decorate pillows, table runners, candles and more. Cord jewelry items, friendship bracelets, ropes to applique onto designs...the sky is the limit. Use any fibers, yarns, or strips of material. Combine your favorite colors, team colors, school colors, or colors to coordinate with a project.
-
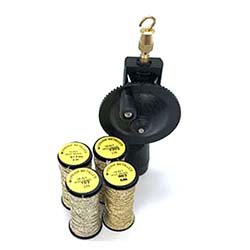
Custom Corder Gold Set
Get started making gorgeous trims, cords, and jewelry with the hand-held Kreinik Custom Corder and four gold metallic threads.
-
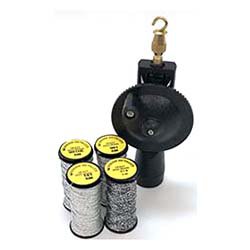
Custom Corder Silver Set
Get started making gorgeous trims, cords, and jewelry with the Kreinik Custom Corder and silver metallic threads.
-
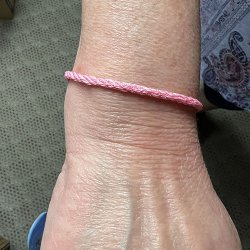
How to make a pink friendship bracelet
Pink is more popular than ever, thanks to a certain movie out in the summer of 2023. Here's how to make your own friendship bracelets using pink shades of Kreinik metallic threads. Gather your friends for a DIY craft party celebrating both the movie and friendship.


Shop Needlework > Free Patterns > Crafts > Christmas
-
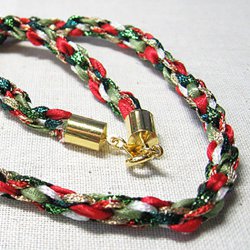
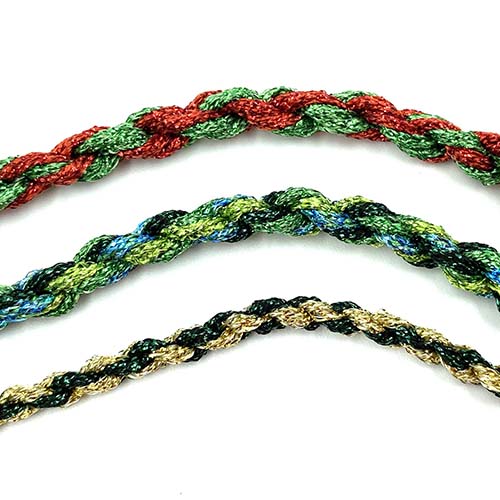
Twisted cording using 4 colors
Note: this item is not shipped
Enlist three of your friends to help you make 4-color twisted cording for friendship bracelets or piping on projects like stockings and ornaments. You can choose your own colors and match your cording to designs or outfits.
Materials needed:
- 4 colors of Kreinik Heavy #32 Braid, 1/8" Ribbon, or Medium #16 Braid or for finer cording use #4, #8,#12 or even Serica silk
- Kreinik Custom Corder
- 3 friends to help you
Instructions:
1. Measure your project to determine the length to make your trim. Multiply that measurement times 3 to determine the total length of thread you need to cut in order to complete your trim. Cut each color that length. (i.e. for 12" trim you need four 36? lengths of thread).
2. Take one of your thread colors and tie the ends together; this forms a loop. Loop a second thread through the first loop and tie the ends of that thread. Have friend #1 stand opposite you and hand that person the second loop which should now be attached to the first loop.
3. Take the thread you are holding and slip the knotted end onto the hook of the Corder. Note: the knotted ends should always be the portion of the loop on the outside. This way it will not become part of the trim.
4. Begin twisting with the Corder. When the thread becomes so tight that it almost begins to kink, stop winding. Carefully remove the thread from the Corder, holding it tightly, and hand the end to friend #2 to hold securely.
5. Now drape another thread around the center of your twisted threads and tie the new thread's ends together. Insert the knotted end of the new looped thread onto the hook of the Corder, and begin twisting until the third thread is twisted tightly. Now let friend #3 hold that end securely.
6. Drape the fourth thread over one of the twisted threads at the intersection of your three threads and make another loop by knotting the ends. Loop the knot onto the hook of the corder and begin twisting.
7. When this fourth thread is twisted tightly, hang the Corder by its hook in the center where all of the threads intersect. Carefully collect the ends holding them together with one hand while keeping the tension on the threads by pulling down on the weight with your other hand. When all of the threads are held together and aligned at a 90 degree angle to the floor, release the weight. The threads will naturally twist forming your cord. You have now made a 4-stripe corded trim for your project.
- Tip 1: If you want the cording to be thicker, use more than 1 strand of each color.
- Tip 2: You can add more stripes. You just need more friends.
- Tip 3: Beads or charms are easy to slide onto the threads before twisting.
- Tip 4: It is easy to make faux jewelry with the corder.
- Tip 5: This is a "kid tested" product. They love it.
- Tip 6: Easily make belting for sweaters.
- Tip 7: Blend different types of threads to make interesting purse handles or straps.
- Tip 8: Make decorative cords for lanyards.
-
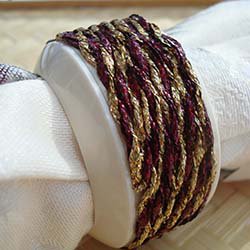
Renaissance Napkin Rings
Note: this item is not shipped Bring the elegance back to a dinner table, the shimmer back in a soiree, with this easy dollar-store napkin ring transformation. Yes, that's right - pick up an inexpensive pair of plain napkin rings at a dollar store, Walmart, Target, etc, and decorate them with elegant fibers that are simply twisted together. The result is a high-end, timeless decoration for your dinner party.
Materials needed:
• plain napkin rings
• spools of Kreinik 1/8" Ribbon in your choice of colors. We used the holographic thread colors for their extra elegance and sparkle (flecks of color in the thread literally dance in the light). We recommend getting several 10m spools in each color, depending on how many napkin rings you want to decorate.
• Kreinik Custom Corder
• Treasure Tape, 3/4" Roll or size to match your napkin ring size
Instructions:
1. First measure the amount of cord you will need by wrapping some of your 1/8" Ribbon around the napkin ring. Multiply this measurement times 3, and that is how much of each color you need to make the cording for one napkin ring.
2. Proceed to cord your threads together. Instructions come in the Custom Corder package, or click here to see them. It helps to have another person on hand to hold one end as you cord, but if you don't have an extra hand, secure the end to a bulletin board and continue to cord.
3. Once your cording is complete, lay your Treasure Tape on the napkin ring. Remove the red liner to expose the top sticky area, then lay your cording on the tape, pressing as you go along, covering all of the exposed sticky areas.
4. Repeat with each napkin ring you wish to embellish. -
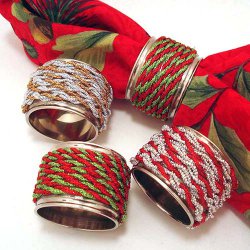
Holiday Napkin Rings II
Note: this item is not shipped
Materials needed:- purchased napkin rings with smooth surface
- Kreinik Treasure Tape™ either in rolls to match the size of your napkin rings (such as 3/4" roll, or 1" roll)
- Kreinik Custom Corder™ trim-making tool
- Kreinik Heavy #32 Braid™ in holiday colors - such as 003 Red and 015 Chartreuse
- Option: Kreinik Facets™ in Silver
- Kreinik Metallic Cord™ in color to match one of your Heavy Braids (such as 003C Red and 001C Silver)
- sharp sewing needle
- tape
Instructions:
1. Lay your double-sided Treasure Tape™ on the surface of your napkin rings.
2. Cord trim using the Custom Corder™ tool and the metallic braids (or combine a Braid color and the Silver Facets™) following the instructions that come with the Corder.
3. Remove the red liner from your taped napkin ring and lay your cording at a starting point. Wrap the cord around the napkin ring, pressing into the tape.
4. When complete, tape the raw end of your cording, and cut any extra thread off at that tape point (the tape keeps the ends from raveling). Fold the taped end under, and, using your metallic Cord thread and your needle, wrap and tack the end of the cording to secure.


Shop Needlework > How To > Custom Corder
-
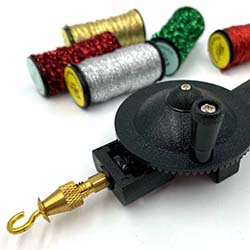
Custom Corder Basic Instructions
The Custom Corder is a hand-held tool that twists together two or more strands of thread to create cording, piping, and trim. You can use this tool to make jewelry, trim for finishing needlework, ornaments and home decor, make purse straps and belts...the uses are endless. You can pick your own colors to match your project, and make professional cording at home.
The best way to learn how to use it is by watching the cording videos on our YouTube channel, www.YouTube.com/Kreinikchannel. We have also included helpful videos in the DESCRIPTION tab on this page (scroll down).
WhIch threads do you need? Kreinik threads, of course, plus embroidery floss, knitting or crochet yarn, and ribbons work best. We have also corded thin strips of fabric, thin strips of leather, and thin strips of rick-rack. Experiment and have fun combining different fibers in your favorite colors (or school colors).
Written instructions:
STEP 1: Determining how much thread you need
- The ratio of starting thread to finished trim is 3 to 1. How long do you want your finished trim to be? Multiply that length times 3 and you get how much thread you need for cording. If you want to make sure you have plenty to work with, it's fine to add extra length, but you will need at least a three times the amount you want to have when you're done.
- If you want to finish with a 16-inch trim, for instance, you multiply 16 times 3, and that gives you 48...you need to start with 48 inches of thread.
STEP 2: How many people do you need to make cording?
- For basic, two-color cording, it is helpful to have two: one person to hold the corder, and another person to hold the other end of your thread.
- If you are by yourself, you can attach the other end to a cup holder on a wall, for instance, or another sturdy, stable, immoveable tool.
- If you want to cord multiple colors, you need more people to hold the additional thread ends. The more friends you have, the more colors you can add!
STEP 3: Start cording (making two-color cording, candy-cane style)
- Cut the length of thread you need (see Step 1 above), the same for each color.
- Tie one thread into a loop (knot it's ends together)
- Insert the other thread through the loop and knot it's ends together.
- So now you have two threads looped together.
- Have a friend hold one thread at the knotted end while you attach the knotted end of the other thread to the Custom Corder's hook.
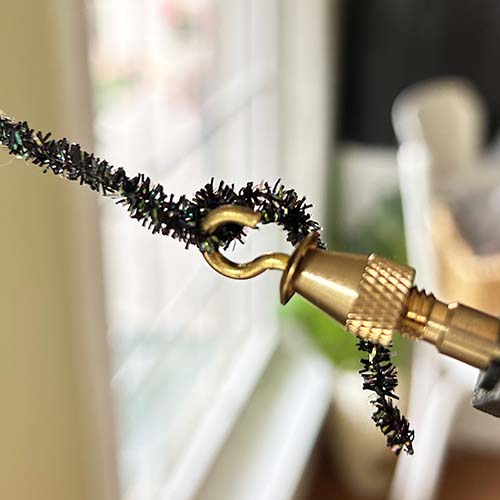
- Start twisting the handle on the Corder. Have your friend stay still, and keep the line taut as you twist. Twist until you feel tension on the line. You can perform a kink test to see if it's tight enough: take the end connected to your corder and move it slowly toward the opposite end. If the thread begins to kind (see photo), it's ready.
- While your friend holds both ends taut, you place the custom corder in the center of your trim using the hook. (See photo below) Hold the corder in place, then bring the thread ends together above it, keeping constant tension.
- Then let go of the corder and let it twist. Allow it to spin until it stops.
- Remove the corder and tie a knot at the loose ends. Your trim is now ready to be used on your project.
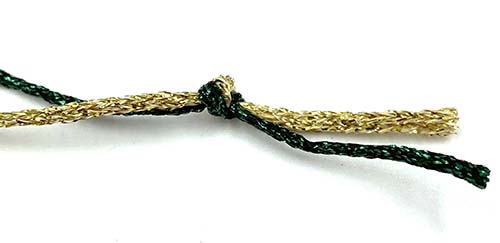
OPTION: To make "herringbone" type cording (two colors side by side, rather than candy-cane style), follow the same instructions above, except in Step one, instead of looping threads together, you place them side by side. See photo.
- Hold two colors together so that the threads are parallel to one another, and tie them together at each end. Then follow the cording instructions above.
- It's a little more difficult to spot the center of this cording, so do your best to visually measure or have another friend measure.
-
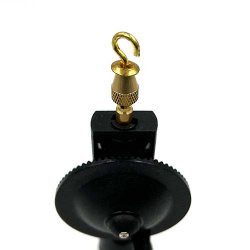
Did your Custom Corder hook fall out?
Sometimes, when there is too much pressure on the thread as you are using the Kreinik Custom Corder, the hook may fall out. In this video, Doug Kreinik shows you how to put it back:
Note: You will need a pair of pliers to help tighten the chuck (the ridged part right below where the hook sits).
-
Watch Custom Corder How-to Videos
The Kreinik Custom Corder is an easy way to make professional trims at home. Use any fiber, in any color, and make any weight of cording to finish your needlework projects. It's also great for making friendship bracelets. Watch these videos to see how the Custom Corder works, and bookmark this page in case you forget how to use your Corder.
Visit the sources of these fabulous videos on YouTube:
- https://www.youtube.com/@helend.flosstube
- https://www.youtube.com/@TothePointwithKathySchmitz
- www.YouTube.com/kreinikchannel
- https://youtu.be/q9PtAE0NKpg
-

How to cord a long purse strap
The Custom Corder is a great tool for making custom piping: combine any fiber, in any color, to be any thickness. The length of your needed piping determines how much thread goes into it: you take your piping length and multiply it times 3, and that's how long each fiber in your trim needs to be. What about if you want to make a purse strap? Three times the length of a purse strap sounds like a really long length of fiber. Watch our video below to see how we made one for a Melissa Prince needlepoint canvas purse.
-
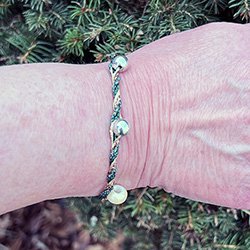
How to make beaded friendship bracelets
Watch Doug Kreinik show you how to add beads to cording while making friendship bracelets with the Kreinik Custom Corder:


